Implementing a simple mobile telemetry system using a simple LAMP stack

So every year around this time ie. the holidays, I’ll embark on a coding (more like “hacking”) spree and one of the on-going projects has been to build a simple telemetry (or what I called “App Beaconing”) system. I started with using Splunk (ie. beaconing to a Splunk server) and got a little frustrated with the whole process of finding a cheap Splunk instance to host it on (lol).

So last year (yeah, talk about *late* documentation! The code *is* on github tho), I decided to keep it simple and just implement a simple REST API on a LAMP stack and host it on Digital Ocean. Oh gosh I so love Digital Ocean! The best thing about DO is that it is just great for hobbyists cos unlike AWS (you practically sign your life away once you give them your credit card. It makes Amazon *really* rich tho) you can control your spend. Just prepay a fixed amount eg. $100 and once you hit that limit you know you have overspent or not (and it’s probably time to do some spring cleaning). You don’t clock up bills of like thousands of dollars (which happens a fair bit on AWS, so I’ve heard).

OK, enough with the bullcrap. Here is the github repo:  https://github.com/foohm71/DeviceBigBrother

The README.md is pretty descriptive. This is fairly old code and not updated so you’ll have to do your own updating (sorry!). There are 3 main folders:

  • LAMP – this is where the server code resides. There are PHP scripts and MySQL scripts there for set up.
  • iOS – this is code for the iOS app for beaconing the device location etc
  • Android – ditto for Android app

So what’s with the “hash” thingy? Well the code and server uses a shared secret to generate a HTTP Authorization header so that you know the POST is legit. (I’m too cheap to go with HTTPS).

Have fun!


Leave a comment

Filed under Uncategorized

Home Guard: A simple home security system using RPi, 433Mhz sensors/receiver, USB webcam

For the 4th of July long weekend, I finally decided to dig up my stash of IoT “toys” and actually build something. I was also motivated since I was going away for the summer and wanted a low power, simple sensor based system to “keep an eye” on the apartment.

What I dug up

This is what I dug up:
  1. A Raspberry Pi 2 that came with USB WiFi dongle, SD card (you can get one of these kits from Amazon – https://www.amazon.com/CanaKit-Raspberry-Complete-Starter-9-Items/dp/B008XVAVAW/ref=sr_1_16?s=electronics&ie=UTF8&qid=1499106573&sr=1-16&keywords=raspberry+pi+canakit )
  2. An unused, now defunk Ninjablocks kit that came with a door and PIR 433Mhz sensors (you can get these on Amazon – https://www.amazon.com/TOGUARD-Wireless-Detector-Receiver-Security/dp/B01LXI9ONK/ref=sr_1_1?s=electronics&ie=UTF8&qid=1499107028&sr=1-1&keywords=433+Mhz+PIR+sensor https://www.amazon.com/433mhz-sensor-contact-alarm-system/dp/B01MU3H13C/ref=sr_1_1?s=electronics&ie=UTF8&qid=1499107052&sr=1-1&keywords=433+Mhz+door+sensor)
  3. A little starter kit with a small breadboard and some wires for connecting to the GPIO ports on the RPi (something like this – https://www.amazon.com/TTnight-SYB-170-Breadboard-Colorful-Prototype/dp/B06XTR2PSK/ref=sr_1_cc_6?s=aps&ie=UTF8&qid=1499107924&sr=1-6-catcorr&keywords=electronics+tiny+breadboard+kit and https://www.amazon.com/dp/B019SX72CI?psc=1)
  4. A simple USB webcam eg. https://www.amazon.com/Kinobo-Webcam-1080dp-Windows-Microphone/dp/B005Q7L6QO/ref=sr_1_12?s=electronics&ie=UTF8&qid=1499109412&sr=1-12&keywords=usb+webcam+with+stand
433Mhz Sensors from (now defunk) Ninjablocks

433Mhz Sensors from (now defunk) Ninjablocks

I figured I could easily whip up a simple sensor set up that would email me a photo of the apartment if it detected a presence or door opening.

Initial Set Up

First was to set up the RPi using NOOBs. For those who don’t know, you can go here https://www.raspberrypi.org/help/videos/#noobs-setup on videos on how to set up NOOBs to install Raspbian (the OS) on you RPi.
Also you’ll need to set up WiFi for the Raspberry Pi.

433 Mhz RF Receiver setup and test

Next is to set up the RPi to receive signals from the PIR and door sensor. You need to get one of these – https://www.amazon.com/433Mhz-Transmitter-Receiver-Link-Arduino/dp/B016V18KZ8/ref=sr_1_3?s=electronics&ie=UTF8&qid=1499108434&sr=1-3&keywords=433+mhz+transmitter+and+receiver. They come in a set but we’re only using the receiver.
Next follow the instructions found here to set up the receiver and test that you’re getting. Here are some links to instructions on how to do this:
  1. https://tutorials-raspberrypi.com/let-raspberry-pis-communicate-with-each-other-per-433mhz-wireless-signals/ – just follow the instructions to set up the receiver
  2. Build and compile the RFSniffer found here – https://github.com/ninjablocks/433Utils.git
  3. Test that the signals are getting through by activating the sensors (you may need to make sure the battery is still working for them)
433Mhz Receiver

433Mhz Receiver

This slideshow requires JavaScript.

Setting it all up

The code can be found here: https://github.com/foohm71/HomeGuard
I created separate folders for each component so that I could test each on its own:
  1. Sensors – this is the control script to listen to the RF sensors and dump it out to a file “sniff” – start.sh
  2. Camera – this is the script to take a photo and save it in image.jpg – capture.sh
  3. Email – this contains the script to uses Gmail to send an email whenever something is detected – sendmail.py
I personally recommend that you test each of these individually. But first you need to setup/configure for your needs:
  1. You’ll need to install fswebcam – see https://www.raspberrypi.org/documentation/usage/webcams/
  2. 433Utils have already been installed but you may need to config start.sh to configure the dir path
  3. For email, you’ll need to set up a gmail account for this. I don’t recommend using your personal email. You’ll need to config that in sendmail.py. The first time you send an email, gmail will flag it out as suspicious so you’ll need to allow it.
  4. For email, you’ll need to config who you want to send it to as well.
  5. There will be several python packages to install eg. email, subprocess etc. You need to do pip install.
  6. The “sensorAlertCodes” hash in HomeGuard.py are for my own sensors. You’ll need to use RFSniffer when you set up 433Utils to figure out what are the codes for your sensors and configure accordingly.
  7. HomeGuard.py also has locations where “Camera”, “Email”, “Sensors” dirs are located, you’ll need to configure those as well.
  8. I modified RFSniffer C++ code to use <iostream> cout instead of <stdio.h> printf as it wasn’t printing to stdio fast enough. YMMV.
  9. I added a crontab in the git repo as a reference. My set up checks “sniff” every 5mins and if there are entries in there, take a photo and send it with the Subject indicating if the door was open or motion was detected etc.
Have fun! 

Leave a comment

Filed under Uncategorized

Quality is in the eye of the beholder

I just got back from the Better Software West conference (https://bscwest.techwell.com/) and one of the takeaways from Mike Sower’s tutorial on “Measurement and Metrics for Test Managers” was that Quality is in the eye of the beholder.

This reminded me of a funny story.

This happened when I was QA Manager of a small test team in Singapore. One of my test engineers was from India and was really excited as he was heading home in a couple of weeks and was shopping for his family. He had asked his kid sister what she wanted and she said she wanted a digital camera (this was before the iPhone).

He researched and researched on the features and price points of the various digital cameras on the market: number of magapixels, optical zoom etc. It reached a point when he narrowed down to 2-3 models and he didn’t know which to choose, so I recommended he ask his sister what she wanted.

The next day he was shaking his head. I asked him so what she had said.

“Does it come in pink?”

Quality indeed is in the eye of the beholder.

Leave a comment

Filed under Uncategorized

Building a simple app beaconing solution: Part 2

In part 1 of this series I talked about building the Android app to beacon to a Splunk server its location. In part 2, I’ll cover the iOS app that does the same thing.

As in part 1, I will not be covering basic iOS app development. There are a ton of resources and online courses (Udemy, Lynda among others) that cover this. I assume you already know how to build a simple single “page” (or ViewController) app in Objective-C (not Swift) with a Button and TextField, what a IBOutlet and IBAction is, how to dismiss the keyboard on tap outside TextField etc.

The code can be found here (under the iOS folder): https://github.com/foohm71/SplunkBrother

The first part is how we persist the deviceID on the device (just like what we did for the Android app). The code is in the viewDidLoad() method in ViewController.m. The key is using the NSFileManager object. This is pretty standard code that you can find online. One source is here: http://www.ios-developer.net/iphone-ipad-programmer/development/file-saving-and-loading/using-the-document-directory-to-store-files . Essentially the code to get the data stored in “deviceID.dat” is here:

    // this part gets the saved deviceID and displays it
    NSFileManager *fileMgr;
    NSString *documentDir;
    NSArray *directoryPaths;
    
    fileMgr = [NSFileManager defaultManager];
    directoryPaths = NSSearchPathForDirectoriesInDomains(NSDocumentDirectory, NSUserDomainMask, YES);
    documentDir = [directoryPaths objectAtIndex:0];
    
    filepath = [[NSString alloc] initWithString:[documentDir stringByAppendingPathComponent:@"deviceID.dat"]];
    
    if ([fileMgr fileExistsAtPath:filepath]) {
        
        deviceID = [NSKeyedUnarchiver unarchiveObjectWithFile:filepath];
        deviceIdInput.text = deviceID;
    }

The corresponding code to use the value in the TextField to store in the “deviceID.dat” can be found at the submitButton() IBAction method:

- (IBAction)submitButton {
    NSString *deviceID;
    
    deviceID = deviceIdInput.text;
    
    [NSKeyedArchiver archiveRootObject:deviceID toFile:filepath];
    
}

Note: deviceIdInput is the TextField. We already have initialized “filepath” in ViewDidLoad() so this would work.

The next part we’ll talk about is the splunkPing also in ViewController.m. This is essentially the code to beacon the location (once obtained) to Splunk. This basically uses a NSMutableURLRequest object to make the HTTP Post to the Splunk endpoint (in this case localhost for testing). The rest of the code is pretty standard code to make a HTTP request. An example can be found here: http://codewithchris.com/tutorial-how-to-use-ios-nsurlconnection-by-example/ 

The last 2 parts are really the meat of this project: (a) creating a “background service” and (b) obtain lat/long info to beacon. These 2 go hand in hand because (surprise, surprise) iOS only allows for 5 background modes – see https://www.raywenderlich.com/29948/backgrounding-for-ios . The good news is receiving location updates is one of them ie. we are able to write callbacks to trigger when location changes.

The setup code for this can be found in the ViewDidLoad() method:

    
    locationMgr = [[CLLocationManager alloc] init];
    locationMgr.delegate = self;
    // locationMgr.distanceFilter = kCLDistanceFilterNone;
    locationMgr.desiredAccuracy = kCLLocationAccuracyBest;
    [locationMgr startUpdatingLocation];
    NSLog(@"LocationManager started");

Next we need to write the handlers for 2 cases: (a) when there’s an error and (b) when location is updated. Note that unlike the Android app where we needed a try-catch block to handle no location received, here Apple already provides the hook in the form of the error method.

-(void)locationManager:(CLLocationManager *)manager didFailWithError:(NSError *)error{

    [self splunkPing:deviceID withLatitude:0.0 withLongitude:0.0];
    NSLog(@"Error: %@",error.description);
}

-(void)locationManager:(CLLocationManager *)manager didUpdateLocations:(NSArray *)locations {
    // If it's a relatively recent event, turn off updates to save power.
    CLLocation* location = [locations lastObject];
    NSDate* eventDate = location.timestamp;
    NSTimeInterval howRecent = [eventDate timeIntervalSinceNow];
    NSString *coord;
    
    NSLog(@"Inside didUpdateLocations");
    
    if (fabs(howRecent) < sleepInSeconds) {
        // If the event is recent, do something with it.
        NSLog(@"latitude %+.6f, longitude %+.6f\n",
              location.coordinate.latitude,
              location.coordinate.longitude);
        coord = [[NSString alloc] initWithFormat:@"%f,%f",location.coordinate.latitude, location.coordinate.longitude];
        
        [self splunkPing:deviceID withLatitude:location.coordinate.latitude withLongitude:location.coordinate.longitude];
        
    }
}

This is pretty standard and you can find example code from the link listed above as well. Please note, for this to work you need to enable permissions in the project’s Info.plist – see the section “Receiving Location Updates” in the link.

Leave a comment

Filed under Uncategorized

Building a simple app beaconing solution: Part 1

One of the side projects I’ve been working on is to build a simple beaconing app (iOS and Android) to beacon the device’s lat/long onto a Splunk server. This could be used as a way to keep track of test devices or even some kind of geofencing for a device lab.

There are 3 parts to this post:

  1. Part 1: covers the Android app
  2. Part 2: covers the iOS app
  3. Part 3: covers the Splunk set up and custom scripts

For those who do not know, Splunk (splunk.com) is a really cool devops tool that makes it really easy to injest all kinds of logs eg. syslog, apache access logs, log4j etc and makes it really easy to search, create dashboards and alerts with queried log entries. Other than injesting logs, Splunk is also able to listen to a TCP port for events or in version 6.3, allow you to create a simple http event listener that processes events encoded in JSON format.

Some folks will ask, why not use ELK (Elasticsearch, Logstash, Kibana)? I may decide to investigate that at some later point as I strongly believe this is also possible using an ELK stack.

Ok let’s start with the Android app. So I will not cover the basics of creating a simple Android app as there are tons of resources on developer.android.com on how to build one. There are also video courses on Udemy (udemy.com), Lynda.com (now incorporated into LinkedIn) and other online course sites for this. For this entry I assume the reader already knows how to create a simple 1 Activity app, how to create UI elements such as input boxes, buttons and bind them to handlers to execute code.

The code can be found here: https://github.com/foohm71/SplunkBrother

For this post, we’re only interested in the “Android” part. To view and build the code, I would recommend using Android Studio. You can download it from developer.android.com.

If you navigate down the folders in “app/src/main”, you’ll eventually come to 2 files: MainActivity.java and SplunkService.java.

We’ll start with the MainActivity.java first. There are a few more advanced Android concepts here: (a) SharedPreferences and (b) AlarmManager. Most of the code is pretty standard Android code to identify the various UI elements on the activity ie. inputBox, submitButton etc.

You can read more about SharedPreferences here: http://www.tutorialspoint.com/android/android_shared_preferences.htm . Essentially it allows you to persist a set of key-value pairs on the app on the device for retrieval each time the app is run. We use this mechanism to persist a device ID to identify the device in the beaconing.

The code fragment:

SharedPreferences settings = getSharedPreferences(PREFS_NAME, 0);
mDeviceID = settings.getString("deviceID", "");
inputBox.setText(mDeviceID);

Just restores the saved SharePreferences KV pair with key “deviceID” and displays on the inputBox.

If the user changes the value, then we change the value:

SharedPreferences.Editor editor = settings.edit();
editor.putString("deviceID", mDeviceID);
editor.commit();

AlarmManager basically allows you to set up repeated alarms to trigger some code. You can learn more here: http://developer.android.com/training/scheduling/alarms.html

The code below is basically just to set up an alarm to trigger the pingService (we’ll cover this later) every 600000 millis.

Intent intent = new Intent(this, SplunkService.class);
PendingIntent pingService = PendingIntent.getService(this, 0, intent, PendingIntent.FLAG_UPDATE_CURRENT);
AlarmManager alarmManager = (AlarmManager) getSystemService(Context.ALARM_SERVICE);
alarmManager.cancel(pingService);
alarmManager.setRepeating(AlarmManager.RTC_WAKEUP, System.currentTimeMillis(), 600000, pingService);


Next we look at SplunkService.java

There are just a few key things to understand this. (a) You need to have the networking code as AsyncTask and (b) how to use the LocationManager to obtain the lat/long.

In the code, I’ve implemented 2 ways of beaconing to Splunk – via HTTPClient and using Socket. These are pretty standard Java – there’re  ton of examples of these in StackOverflow. What is important to note (for newbie Android devs) is that you need to have them encapsulated into an AsyncTask so that they are non blocking. All networking code is blocking and hence can’t be run on the main UI thread for the app. When that happens, Android barfs. Hence the inner classes SendToSplunkHTTP and SendToSplunkSocket.

Now to obtain the location of the device. The code for this is:

LocationManager manager = (LocationManager) getSystemService(Context.LOCATION_SERVICE);
Location loc = manager.getLastKnownLocation(LocationManager.NETWORK_PROVIDER);

However you may note that is not what I did here. This I only realized thru testing (hence you should always test!). Basically the problem is that I kept getting NullPointerException for loc object. Reason was that getting the location object is error prone. Hence you should always have a fall back, in my case, I implemented a try-catch block to just give the lat/long as 0,0 if the loc object was null.

More info on LocationManager can be found here: http://www.vogella.com/tutorials/AndroidLocationAPI/article.html and here: http://javapapers.com/android/get-current-location-in-android/

One thing to take note is that to use LocationManager, you need to set permissions on AndroidManifest.xml:

    <uses-permission android:name="android.permission.INTERNET" />
    <uses-permission android:name="android.permission.ACCESS_COARSE_LOCATION"/>
    <uses-permission android:name="android.permission.ACCESS_FINE_LOCATION"/>   


Leave a comment

Filed under Uncategorized

Managing user churn on external tools

One of the best things about starting a company now is the sheer wealth of tools available to effectively outsource your entire infrastructure, outsource corporate systems eg. AWS, Github, Crittercism, Flurry, Gmail, Google Drive etc. The problem of course is user churn – people come and people go and someone has to maintain the hygiene of these external accounts.

Most companies of a certain size have a HR database somewhere – so that may allow (or it is possible to expose an API) to check if an employee still exists. Also it’s usually companies of a certain size that this issue becomes a little more problematic.

Unfortunately, the tools usually don’t expose an API for your to query users that belong to a particular company or organization. They usually do have a WebUI but that’s pretty manual.

One way I’ve tackled this problem is to have a simple MySQL database with a simple PHPMyAdmin (see https://www.phpmyadmin.net/) to store a copy of each tool’s user list. So each table would correspond to one tool’s user list. Then there will be a simple cron job that runs each day to check users against the HR database. I had my scripts written in Perl (embarrassingly so but it was much easier to do so given the bindings to internal stuff) and it would send out a daily email for each tool of who has since left the company.

Once you have this set up then it’s a breeze since all you need is to review the latest email and start removing them from the tools.

The problem is performing the first data import. PHPMyAdmin allows you to import via CSV but you need the first CSV list. If the tool provider has an API then you’re good but a lot don’t so you’re stuck with a WebUI. One way is to use Selenium WebDriver to do just that. I have put the script (sans my actual password) for getting Apple Developer accounts (if you’re an admin) here:  https://github.com/foohm71/AppleDeveloperAccount/blob/master/appledev.py . Note – Apple may change their WebUI anytime so you’ll have to modify accordingly but you get the idea.

Leave a comment

Filed under Uncategorized

A canary in the coal mine for your app CI pipeline

One of the issues of maintaining a CI pipeline is how to know if the various components: (a) source repository (b) build farm (c) artifacts repository (d) test farm – are working at any point in time since when developers want a build, they do not want to have to be blocked by problems with the pipeline.

One way to check this is to have regularly scheduled build/test runs on very simple apps with no major external dependencies.

I had created just this a while back called the Canary App (see https://github.com/foohm71/Canary-iOS and https://github.com/foohm71/Canary-Android) just for this. The contain some simple tests that do not utilize any network so test should always pass. Currently UI tests are only in UI Automation (iOS) and Robotium (Android).

The nice thing about having regularly scheduled runs is that if the build/test run fails, you can check to see which part of your CI pipeline is having issues and immediately address them before a critical build kicks off.

Leave a comment

Filed under Uncategorized

A glimpse of Maker Faire 2015

One of the things I love about living in the Bay Area is the sheer passion for technology and the spirit of tinkering here. As a geek, I love that I could just pop into a meetup or brownbag hosted at Hacker Dojo or Y-combinator. The big kahuna of geek fest is of course the annual Maker Faire held at the San Mateo held this weekend. Needless to say I was very excited to go! Here’s a peek into some of the stuff there. No number of pictures can do it justice since it is *so* big. I know this is not strictly “mobile” or “testing” related but I just wanted to share this out to everyone. Hope that’s OK. 

For those who do not know what Maker Faire is, do read this: http://makerfaire.com/makerfairehistory/

Ok let’s go!

At Maker Faire (Bay Area), there’re usually exhibits out in the open and in the various exhibition halls. The open exhibits are usually quirky and fun. Here are some I saw this year:

Signposts at the fair

Signposts at the fair

First of all, we need to know where we are … LOL

Big robot or burning man?

Big robot or burning man?

Steam punk!

Steam punk!

Lots of self made cars

Lots of self made cars

Band's playin'

Band’s playin’

Where's the flux capacitor??

Where’s the flux capacitor??

I wonder what Ctrl-Alt-Delete does.

I wonder what Ctrl-Alt-Delete does.

Heavy Metal

Heavy Metal

More heavy metal

More heavy metal

I wonder what's its MPG ..

I wonder what’s its MPG ..

Moon lander?

Moon lander?

This is an Exo-suit

This is an Exo-suit

See https://www.kickstarter.com/projects/584871825/ajax-exosuit-wearable-powered-exoskeleton 

IMG_20150516_175309

I have no idea what this is ..

I have no idea what this is ..

Dalek?

Dalek?

A fire breathing ... horse??

A fire breathing … horse??

Lego – how the maker spirit starts!

Legos!

Legos!

Lego Caltrain

Lego Caltrain

Battleships!

Battleships!

Bay Area Lego Users Group

Bay Area Lego Users Group

Pley - Lego sets for rent

Pley – Lego sets for rent

Pley – they want to be the Netflix of Lego – www.pley.com

Ok on to all the Geek stuff!

Retro! An Apple II

Retro! An Apple II

An Altair replica

An Altair replica

Apple I replica

Apple I replica

For those who are interested in these replicas – http://www.brielcomputers.com/

Robots, robots everywhere! (and drones)

Robots from Meccano

Robots from Meccano

Bot Bash Party!

Bot Bash Party!

Host your own Bot Bash Party – www.botbashparty.com

IMG_20150516_140812

The Homebrew robotics club of Silicon Valley

The Homebrew robotics club of Silicon Valley

See http://www.hbrobotics.org

IMG_20150516_141057

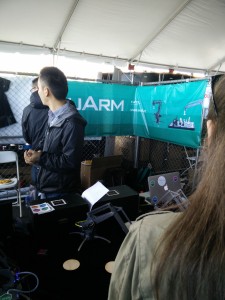
uarm - desktop arduino powered robot

uarm – desktop arduino powered robot

Where to find them – https://www.kickstarter.com/projects/ufactory/uarm-put-a-miniature-industrial-robot-arm-on-your

Challenge Bot - learn to build your first robot

Challenge Bot – learn to build your first robot

See – http://www.challenge-bot.com

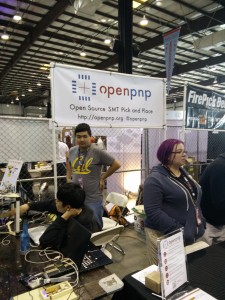
Open PnP - open SMT pick and place machine

Open PnP – open SMT pick and place machine

The OpenPnP machine in action

The OpenPnP machine in action

See http://openpnp.org

Of course these are still dreams

Of course these are still dreams

Hovership - drones!!

Hovership – drones!!

These guys have some cool stuff – http://hovership.com

The Crazyflie nano copter platform

The Crazyflie nano copter platform

See https://www.bitcraze.io/crazyflie/

Not strictly robots but really cool helmets :)

Not strictly robots but really cool helmets 🙂

Micro Drone 3.0

Micro Drone 3.0

See http://www.microdrone.co.uk/

Drone Fight!!

Drone Fight!!

Now for all the IoT stuff 

Hax made a big presence

Hax made a big presence

See http://www.hax.co . Hax is a hardware accelerator.

The CHIP guys are here!

The CHIP guys are here!

These are the guys building the $9 computer – https://www.kickstarter.com/projects/1598272670/chip-the-worlds-first-9-computer

Weaved - smartpower IoT

Weaved – smartpower IoT

See http://weaved.com/iotkit

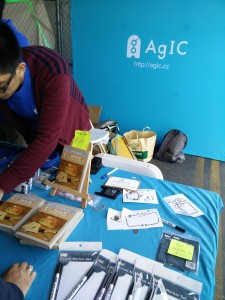
AgIC - pens to write your circuits

AgIC – pens to write your circuits

See https://www.kickstarter.com/projects/1597902824/agic-print-printing-circuit-boards-with-home-print

Arduino voice control shield

Arduino voice control shield

See https://www.facebook.com/asrshield – Kickstarter in June

The 1Sheeld Booth

The 1Sheeld Booth

See http://1sheeld.com/ – use your Android phone to control your Arduino

DF Robot - IoT and Robotics superstore

DF Robot – IoT and Robotics superstore

The DFRobots store

The DFRobots store

This is a Shanghai based Robotics store that has a lot of stuff – see http://www.dfrobot.com/

InitialState - IoT analytics

InitialState – IoT analytics

With a new market segment comes analytics – https://www.initialstate.com/

Modulo - Lego for IoT

Modulo – Lego for IoT

Kickstarter – https://www.kickstarter.com/projects/modulo/modulo-a-simple-modular-solution-for-building-elec

Electric Imp - FPGA modules you can code in

The Mojo board – learn how to use FPGAs

This was really cool – FPGA modules you can code in – Embedded Micro – https://embeddedmicro.com/

The Parallac - an ARM based supercomputer

The Parallac – an ARM based supercomputer

See http://www.parallac.org/

A breadboard wall

A breadboard wall

Maker Bloks - IoT for kids

Maker Bloks – IoT for kids

See http://makerbloks.com/en

Wearable jewelry

Wearable jewelry

See http://www.lumenelectronicjewelry.com

Flutter Wireless - wireless mesh networks

Flutter Wireless – wireless mesh networks

See http://flutterwireless.com

Samurai Circuits and FactoryForAll.com - manufacturing in Shenzhen China

Samurai Circuits and FactoryForAll.com – manufacturing in Shenzhen China

3D Printers etc

Epilog Laser - laser etching

Epilog Laser – laser etching

IMG_20150516_180544

DiWire - wire bender

DiWire – wire bender

See https://www.kickstarter.com/projects/1638882643/diwire-the-first-desktop-wire-bender

Shaper

Shaper

A waffle 3D printer

A waffle 3D printer

IMG_20150516_175833

Machina Bio - 3D printing for Bio

Machina Bio – 3D printing for Bio

See http://www.machina.bio/

Zeus 3D scanner and printer

Zeus 3D scanner and printer

See http://www.zeus.aiorobotics.com/

Biobot

Biobot

Biobot - 3D printing for Biotech

Biobot – 3D printing for Biotech

Everything luminous

IMG_20150516_152714IMG_20150516_152306IMG_20150516_152305IMG_20150516_152338IMG_20150516_152232IMG_20150516_151205IMG_20150516_151144IMG_20150516_151126

And the cloth makers

IMG_20150516_174549IMG_20150516_174545

Leave a comment

Filed under Uncategorized

Using a Proxy framework to automate API robustness of apps

One of the realities of the new world of CI/CD that we live in is the “bad push” or rather one that was not adequately tested before it was pushed by DevOps via Chef or Docker to production servers. This is because it’s just too easy to make a change on the dev env and promote them over to production. In an ideal world there would be automated tests baked into the CI pipeline to catch these issues but when your app is using 3rd party backends, you are at the mercy of the professionalism of these teams. One way to solve this is simply to build your own middleware to ensure the API responses are all kosher. Another way is to bake in defensive programming into your app’s model layer (as in MVC) to ensure that even if bad responses are received, your app does not barf.

To test this, there are several ways: (a) build a full scale mock server that is able to record and replay backend responses (b) use a proxy to intercept the responses and modify it in several ways:
  1. Add/Remove headers
  2. Modify the content body eg. change values for example of the value is an int, change it to a string etc.
  3. Truncate the content body
There are several advantages of using the proxy server approach: (a) you don’t have to build a mock server from scratch and maintain it (b) you are working with traffic from real production backends.

I chanced upon this tool “mitmproxy” while researching for a tool to do just this. There are some nice things I liked about it:
  1. Easy set up – binaries available for MacOSX and pip install for Linux (Ubuntu)
  2. Inline scripts to intercept end point requests and manipulate responses are in Python so no need for complicated set ups using Maven or ant etc.
  3. 2 modes of operation – interactive and CLI

They have the standard MITM certs to decrypt SSL traffic just like Charles Proxy (which is a great tool btw). See http://mitmproxy.org for details.

Once installed and after both mitmproxy and mitmdump are both in your $PATH, you can start digging in to the tool. Best way would be to use the interactive tool “mitmproxy” first to get the feel for it. There are of course flags to change the port etc (default is 8080). This site (see section 2.6) gives a good intro to how to navigate the tool – http://blog.philippheckel.com/2013/07/01/how-to-use-mitmproxy-to-read-and-modify-https-traffic-of-your-phone/

However the real power of this tool is the fact you are able to run what they call “inline scripts” – essentially pieces of Python code handlers for request, response etc.

Here’s an example code to demonstrate this (you can find this here: https://github.com/foohm71/mitmproxy-stuff – it’s the dumpInfo.py script)
def dumpInfo(flow):
   dict = flow.__dict__
   print "[Flow Info]"
   print "Host:" + dict["Host"]
   print "method:" + dict["method"]
   print "protocol:" + dict["protocol"]
   print "[Request Info]"
   print "request start time:" + dict["requestStartTime"]
   print "request end time:" + dict["requestEndTime"]
   print "request body:" + dict["requestBody"]
   headers = dict["requestHeaders"]
   for k in headers.keys():
      print "request header: " + k + " = " + headers[k][0]
   print "[Response Info]"
   print "response code:",dict["responseCode"]
   print "response start time:" + dict["responseStartTime"]
   print "response end time:" + dict["responseEndTime"]
   print "response body:" + dict["responseBody"]
   headers = dict["responseHeaders"]
   for k in headers.keys():
      print "response header: " + k + " = " + headers[k][0]</code>

def request(context, flow):
   dict = flow.__dict__
   request = flow.request
   dict["Host"] = str(request.host)
   dict["method"] = str(request.method)
   dict["protocolVersion"] = str(request.httpversion)
   dict["protocol"] = str(request.scheme)
   dict["requestStartTime"] = str(request.timestamp_start)
   dict["requestEndTime"] = str(request.timestamp_end)
   dict["requestHeaders"] = request.headers
   dict["requestBody"] = request.get_decoded_content()

def response(context, flow):
   dict = flow.__dict__
   response = flow.response
   dict["responseCode"] = response.code
   dict["responseStartTime"] = str(response.timestamp_start)
   dict["responseEndTime"] = str(response.timestamp_end)
   dict["responseHeaders"] = response.headers
   dict["responseBody"] = response.get_decoded_content()

   dumpInfo(flow)
<div>

All this does it extract out information about the request/response and puts it in a dict object that is passed around. Once done, it just prints out the information. To run this, use the CLI version of the tool in this way: mitmdump -s <script>

As there is a framework for this, we could extend this code to perform the following: based on different end points (or hosts), protocols, body, we could perform different types of response manipulation.

One example of response manipulation could be to just truncate a JSON response like this:
deftruncateJSONString(jsonstr, length):
   return jsonstr[:int(length)]

Another could be to recursively parse the JSON response for a key and replace its value:
def findReplaceValue(jsonobj, key, value):
   if type(jsonobj) == type({}):
   for k in jsonobj:
      if k == key:
         jsonobj[k] = value
      findReplace(jsonobj[k], key, value)
Sometimes your request is in the form of a form POST, in that case, you may need to extract a form field and perform the response manipulation based on that or a combination of fields:
form = request.get_form_urlencoded()
username = form[“username"]
dict[“Username”] = username

Leave a comment

Filed under Uncategorized

What is Quality?

As someone who has worked in the area of quality/test engineering for some time, this question has popped up time and again. I have also been involved in several discussions among peers about this question but I have never quite gotten a satisfactory answer, at least not for myself.

Some time back, while reading the book “How Google Tests Software”, I came across the line

Quality != Testing

This really made me balk and ask myself “so what then is Quality, in particular Software Quality?”.

This must come as a surprise to the uninitiated but for those of us in the so called Quality and Test specialization in software engineering, we spend most our time and energy honing the art of testing. Functional testing, performance testing, unit testing etc, how do we test this feature, how do we test that component, how do we “break” the software? Those are the questions and challenges that plague our profession.

So what then is Quality?

I pondered this for a quite a while and then one day it hit me: Quality is and has always been synonymous with the luxury industry.

Take for an example how a Hermes Birkin bag compares to a Coach (now if you’re male, single and straight, you had better learn to distinguish the two fast). One costs a tens to hundreds of thousand dollars and the other a few hundred.

Why is that? A bag is a bag is a bag right? Nope. Each Birkin bag is hand-sewn, buffed, painted, and polished by expert artisans. Note: expert artisans. Artisans who are passionate about their craft.

At the end of the day quality comes down to craftsmanship. We pay for the craftsmanship, not the object.

Software quality, it follows, comes down to software craftsmanship –

1. how systems are designed
2. how systems are built
3. how systems are tested
4. how systems are deployed

Craftsmanship is about pride in the product one is building and it is about knowing and practicing the various aspects of this process.

In “Clean code, A handbook of Agile software craftsmanship”, Robert Martin describes software craftsmanship as both knowledge of the principles, patterns, practices and heuristics that a craftsman knows; augmented with the hard work of applying that knowledge in the daily grind of churning out production ready code. It is hard work and it takes discipline.

Quality hence is everyone’s responsibility. From the design of the UI so that users find it aesthetically pleasing to use, architecting for performance, modularity and testability, deploying in a seamless fashion that minimizes the impact to users, writing code that is efficient yet maintainable; and testing – putting the system through its paces and figuring out what could possibly cause the software to break, or what functionality was missed.

So if quality is everyone’s responsibility, what then is the role of the quality or test engineer?

I would say that it is to encourage software craftsmanship.

This goes beyond testing, although that is the bread and butter of our profession.

Why bother? Wouldn’t it be much easier to just test and report bugs? Yes, but then the true value of finding those bugs is lost. The true value is in asking why those bugs came about in the first place and trying to put in place measures so that it doesn’t surface again. In short – encouraging software craftsmanship.

However, in order to know what good code looks like, you need to have either built code, seen bad code, seen really good code – and mostly all of the above.

Coming back to the Birkin bag analogy: an expert is able to tell a real Birkin bag from a fake. It is down to the fittings, how the leather is prepared, how well the stitching is done. I know intimately about this because I have an uncle who is certified to repair Louis Vuitton products.

In the same way, you can tell if software is designed and built well. But like art, you would have had to have seen/worked with well designed code/systems to know how they look like.

Only when you have seen quality can you build quality.

2 Comments

Filed under Uncategorized